

Step-by-step guide
How to install Windows 11 on a Mac with Apple Silicon (M1) using Parallels
Short answer: to install Windows 11 on a Mac with Apple Silicon (M1, M2 or M3), you can't use Boot Camp; you run Windows in a virtual machine instead. Buy and download Parallels Desktop, open the installer, click Install Windows and let it download and set up Windows 11 for you, then enter your Windows license key.
In this guide you will follow the exact process from the video, done on a 16-inch MacBook Pro with the M1 Max chip running macOS Monterey. The whole Windows 11 installation, from setup starting to a ready desktop, took less than 10 minutes. You will also learn how to get the mouse out of the Windows window, how to go full screen, how your Mac files show up inside Windows, and how to isolate or back up the virtual machine.
Windows 10 is not recommended here: as the video says, it was going to become obsolete quickly, and Microsoft ended regular support for Windows 10 on October 14, 2025. Go straight to Windows 11 on your M1 Mac.
In this article
- Check your Mac's chip and memory
- Buy Parallels and sign in to your account
- Open the Parallels Desktop installer
- Click Install Windows in the installation assistant
- Let Parallels download Windows 11
- Wait while the ISO is validated and setup starts
- Watch Windows Setup install Windows 11
- Let Windows install updates and restart
- Release the mouse with Control + Option
- Activate Windows with your license key
- Use the Actions menu: Travel Mode, Suspend, Restart
- Share USB devices, network and camera
- Go full screen and use your Mac files
- Install the Windows apps you need
- Isolate Windows from your Mac or make a backup
- Why Boot Camp doesn't work on M1, M2 and M3 Macs
- Which Windows 11 edition and license do you need?
- What works and what doesn't on Windows 11 for Arm
- Troubleshooting the Windows 11 install on a Mac
- Tips before you start
- Frequently asked questions
- Watch the video
Step 1Check your Mac's chip and memory
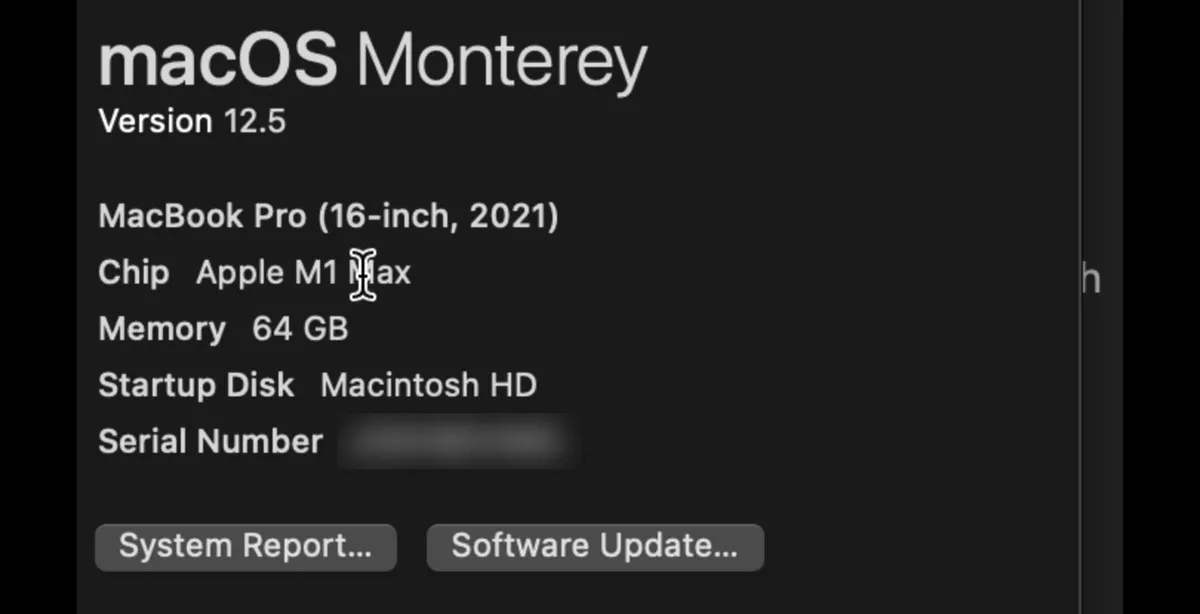
- Open the Apple menu and choose About This Mac. Look at the Chip line: if it says Apple M1, M2 or M3, your Mac uses Apple Silicon and Boot Camp is not an option.
- The Mac in the video is a MacBook Pro 16-inch (2021) with the M1 Max, 64 GB of memory and a 1 TB drive. With that much memory it can run a few virtual machines at the same time.
- Memory matters because Windows and macOS share it while the virtual machine is running. Less memory still works, but give Windows less to do at once.
- Also check free space on the drive: Windows, its updates and your Windows apps all live in the virtual machine file on your Mac.
Step 2Buy Parallels and sign in to your account
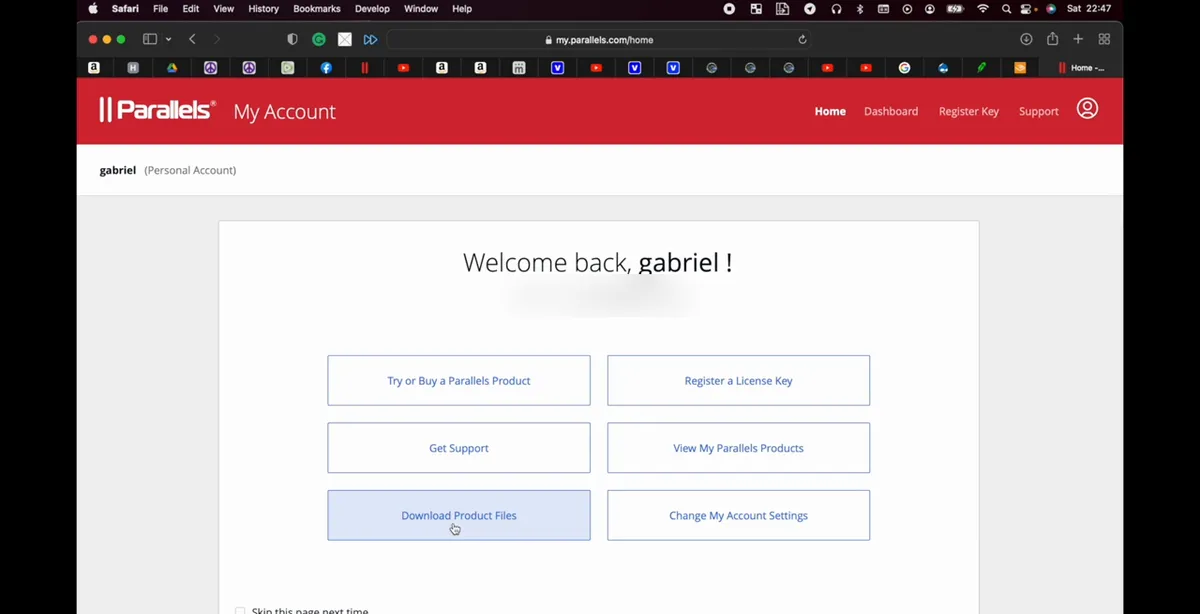
- Go to parallels.com, buy the license and sign in to My Account.
- On the welcome page click Download Product Files (the video calls it Download Products).
- Choose the automatic installer for Parallels Desktop. It is a small file; Windows itself is downloaded later by the app.
- Common mistake: downloading an old version from a third-party site. Always get the installer from your Parallels account.
Step 3Open the Parallels Desktop installer
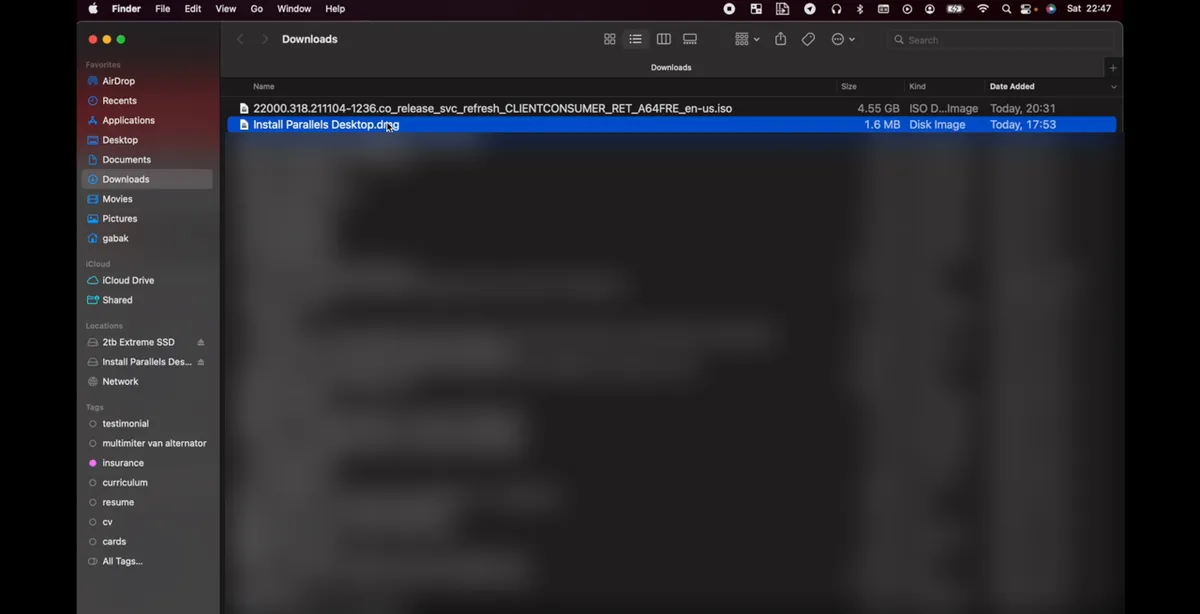
- Open your Downloads folder and double-click Install Parallels Desktop.dmg.
- Double-click the installer inside the disk image and "everything will start working", as the video puts it. Approve the macOS permission prompts that appear.
- If you already have a Windows 11 for Arm ISO file (the video's Downloads folder shows one), you can use it later with a custom install. Otherwise let Parallels download Windows for you.
Step 4Click Install Windows in the installation assistant
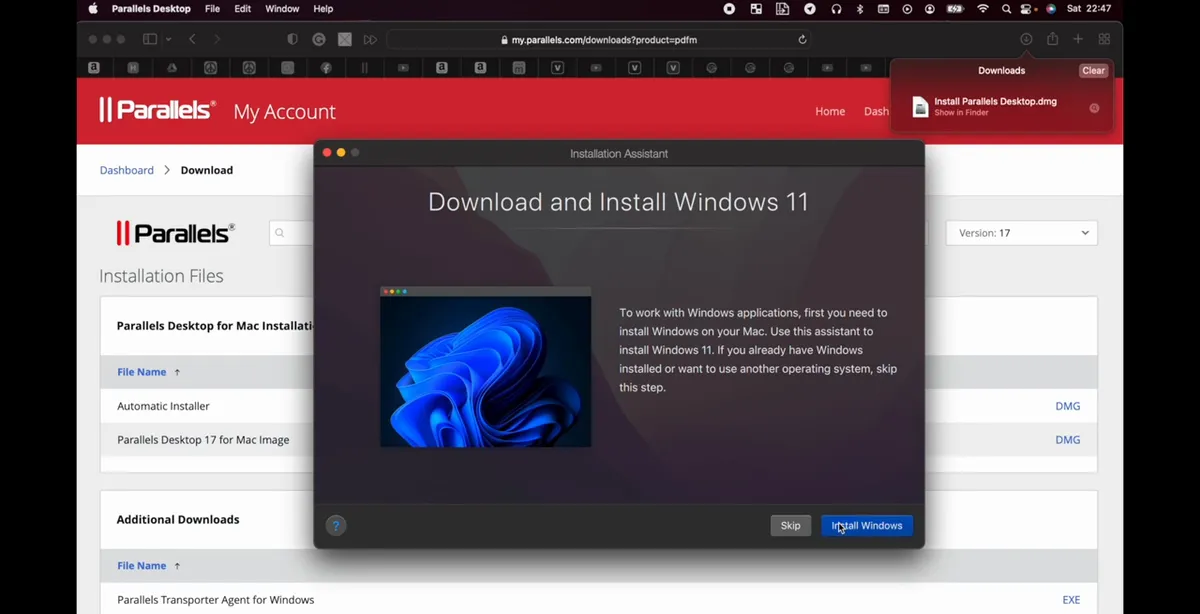
- When the assistant opens, click Install Windows. Parallels picks the right Windows 11 build for Apple Silicon (the Arm version).
- The video starts this step at 10:47 so you can see how long the whole process takes.
- You don't need to create a USB drive or partition your disk: everything happens inside a virtual machine file.
Step 5Let Parallels download Windows 11
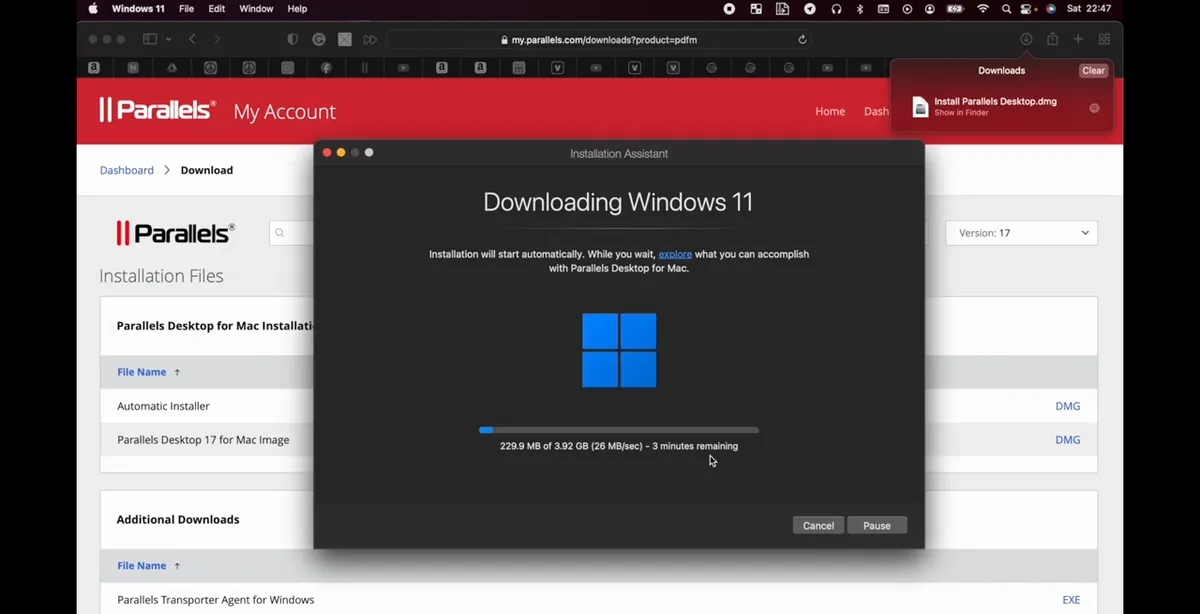
- Parallels now downloads Windows 11. With a fast connection it takes a few minutes; with a slow one it can take a couple of hours.
- In the video the download ran at about 30 megabytes per second, and the screen showed 721.6 MB of 3.92 GB with about 2 minutes remaining.
- Keep the Mac plugged in and awake during the download so it doesn't pause.
Note: If the download gets stuck somewhere, close the window and start the download again, as recommended in the video.
Step 6Wait while the ISO is validated and setup starts
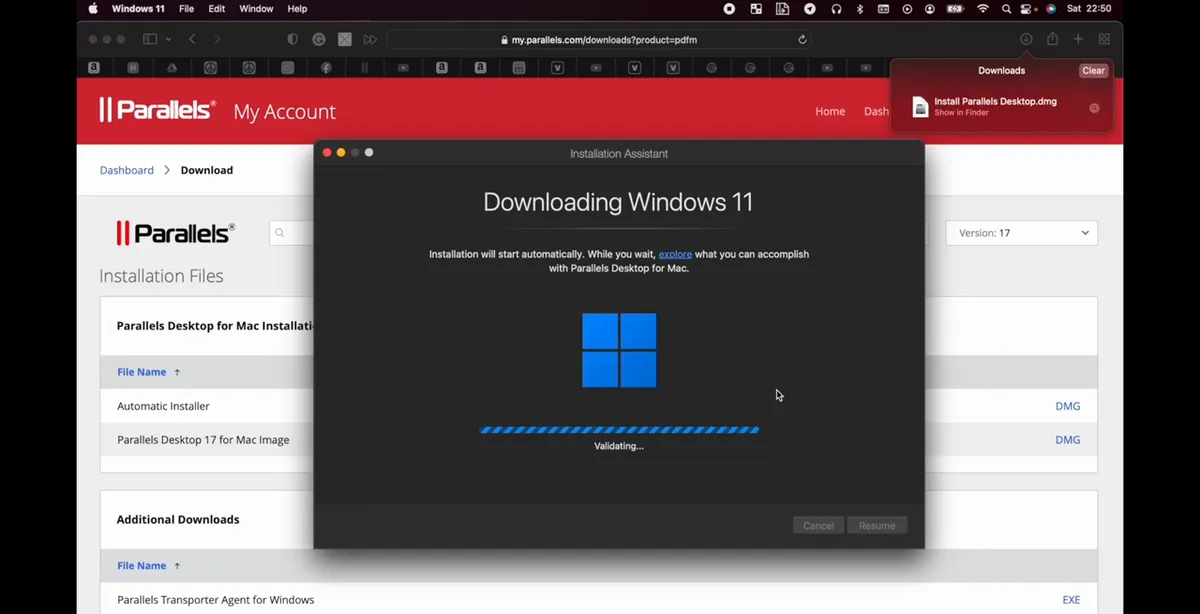
- After the download Parallels validates the ISO (the Windows image file) to make sure it's complete.
- Then Windows Setup starts on its own. In the video, setup started at 10:51.
- There is nothing to click at this point; just wait.
Step 7Watch Windows Setup install Windows 11
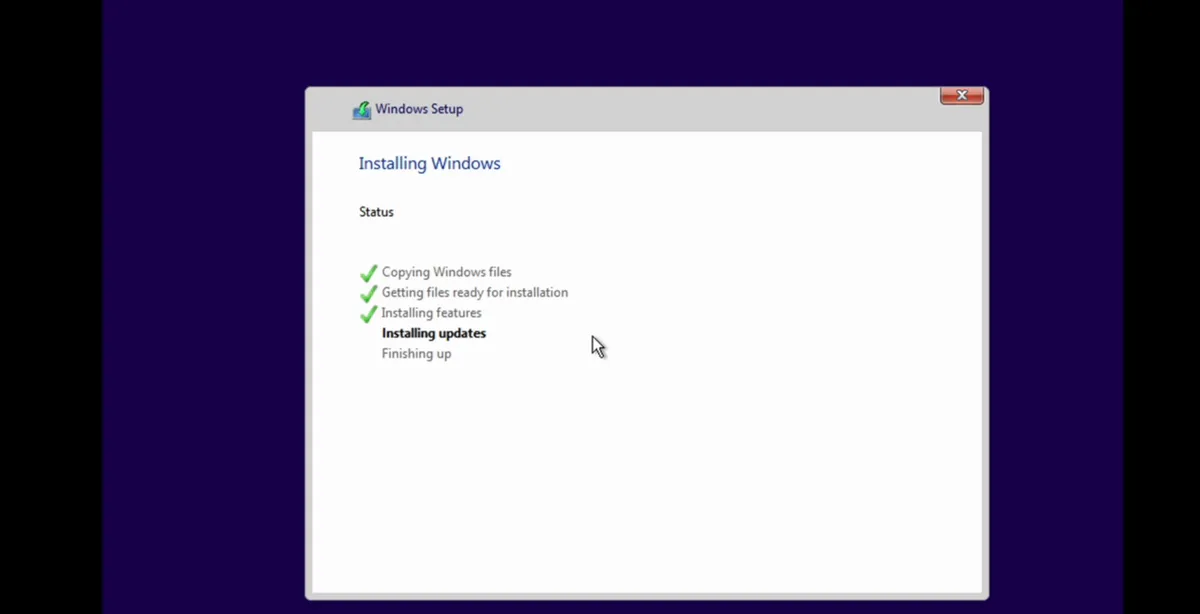
- Windows Setup copies files and installs features. The percentage climbs quickly: 3%, 5%, then 80, 90, 100.
- As the video points out, a clean Windows install is much faster than reinstalling macOS from scratch, which can take two or three hours.
- Plan on 10 to 30 minutes in the worst case; on the M1 Max it took less than 10.
Step 8Let Windows install updates and restart
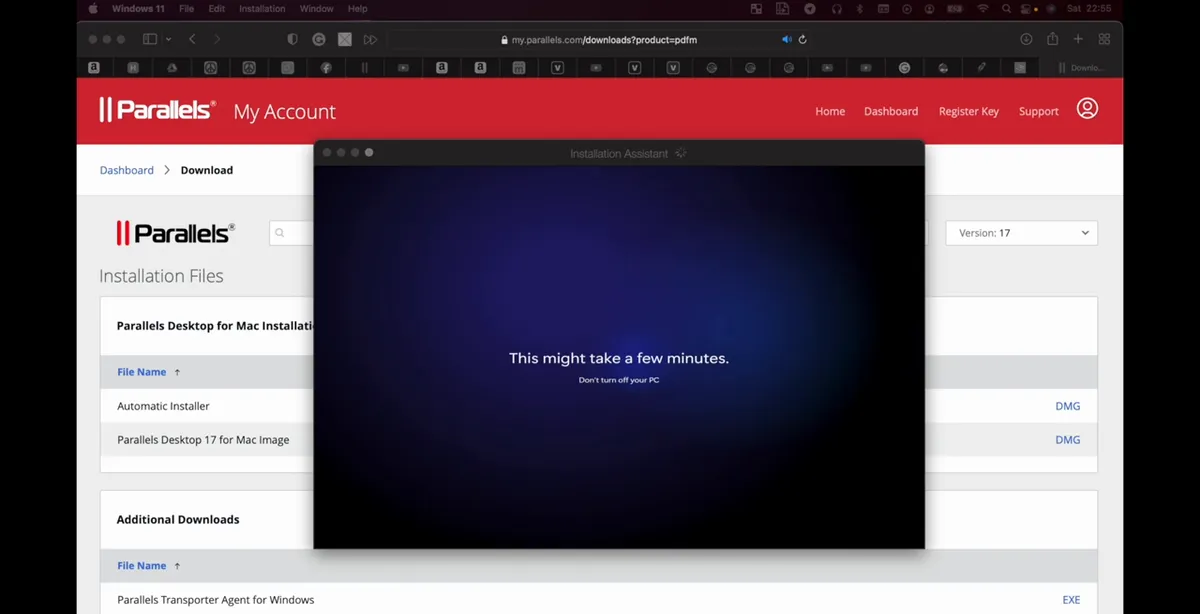
- Windows installs updates and restarts by itself. Don't close the virtual machine during this part.
- In the video everything was done at 10:56, less than 10 minutes after setup began.
- After the first login, open Windows Update and download any remaining updates so Windows is ready to go.
Step 9Release the mouse with Control + Option
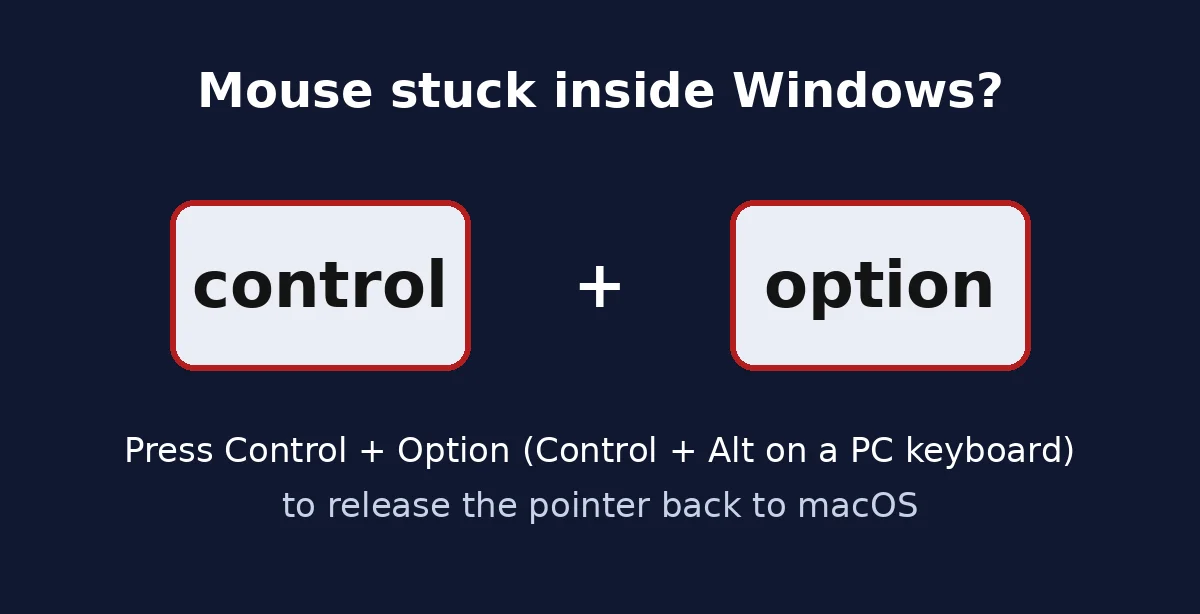
- If your mouse gets stuck inside the Windows window, press Control + Option on a Mac keyboard, or Control + Alt on a PC keyboard.
- Parallels calls this shortcut Release Input. It's on by default and can't be turned off in Parallels' own settings.
- Usually the pointer moves freely between macOS and Windows; it only gets captured in some cases, for example in games.
Step 10Activate Windows with your license key
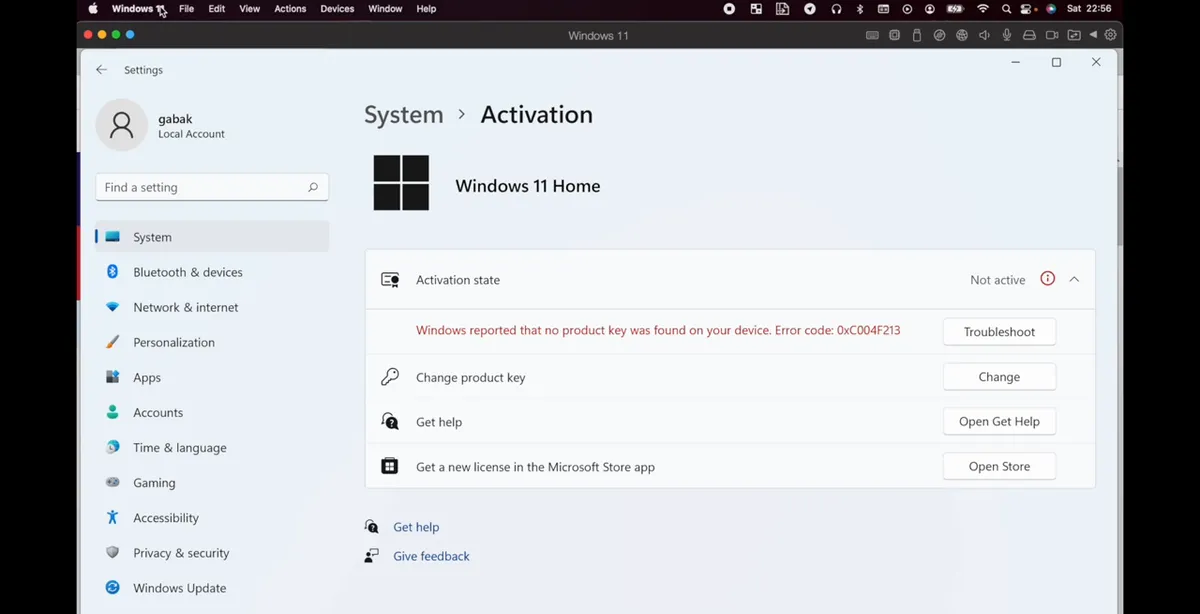
- Windows works right away but shows as Not active. In the video, Settings showed error 0xC004F213, meaning no product key was found.
- Buy a Windows license, then go to Settings > System > Activation > Change product key and enter the code. "That's it."
- Microsoft says each copy of Windows, in a computer or in a virtual machine, needs its own license, and Windows 11 Pro keys work for both Intel/AMD and Arm versions.
Caution: Be careful with very cheap keys from marketplaces; buy from a seller you trust. A key that gets blocked later will deactivate Windows.
Step 11Use the Actions menu: Travel Mode, Suspend, Restart
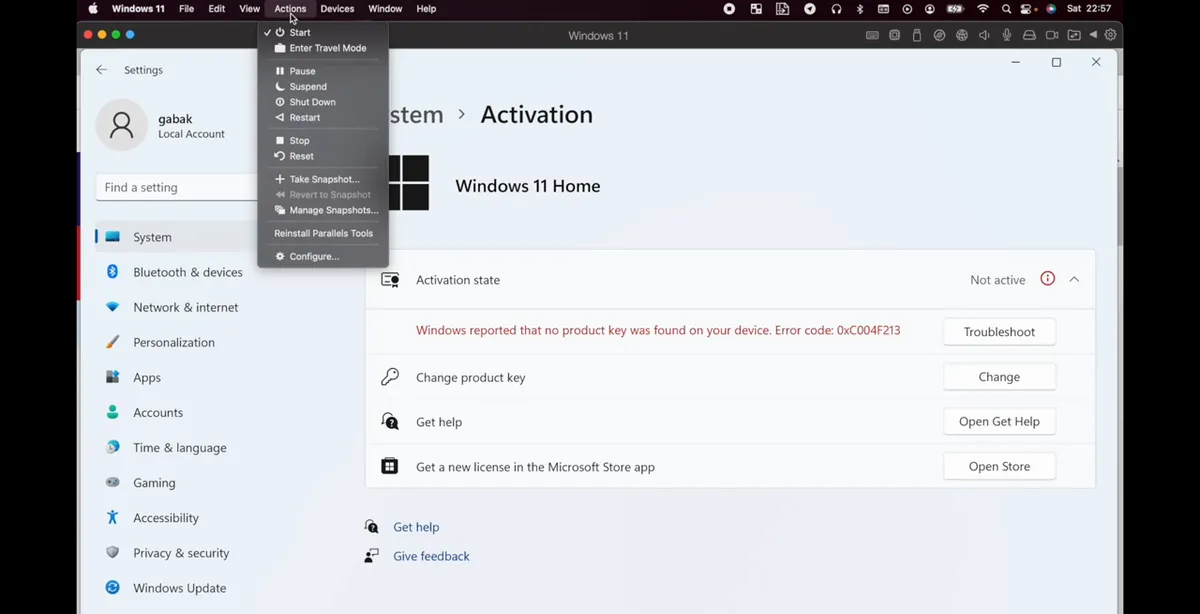
- At the top of the screen, the Actions menu controls the virtual machine: Enter Travel Mode, Pause, Suspend, Shut Down, Restart, Stop and Reset.
- Suspend saves Windows exactly where you left it, so it reopens fast and doesn't use processor power in the background.
- The same menu has Take Snapshot and Manage Snapshots: take one before big changes so you can go back if something breaks.
Step 12Share USB devices, network and camera
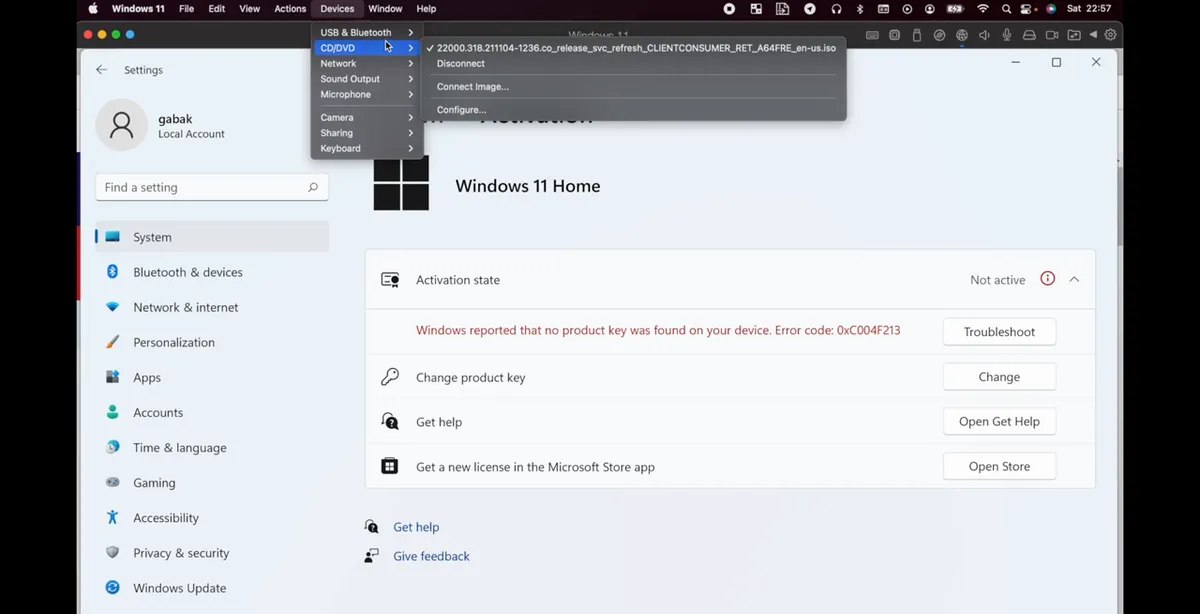
- The Devices menu shows your USB devices so you can connect one to Windows, plus Network, Camera, microphone and sharing options.
- This is where you change the network or share the Mac's camera with Windows apps, as shown in the video.
- Under CD/DVD you can disconnect the Windows ISO once the installation is finished.
Step 13Go full screen and use your Mac files
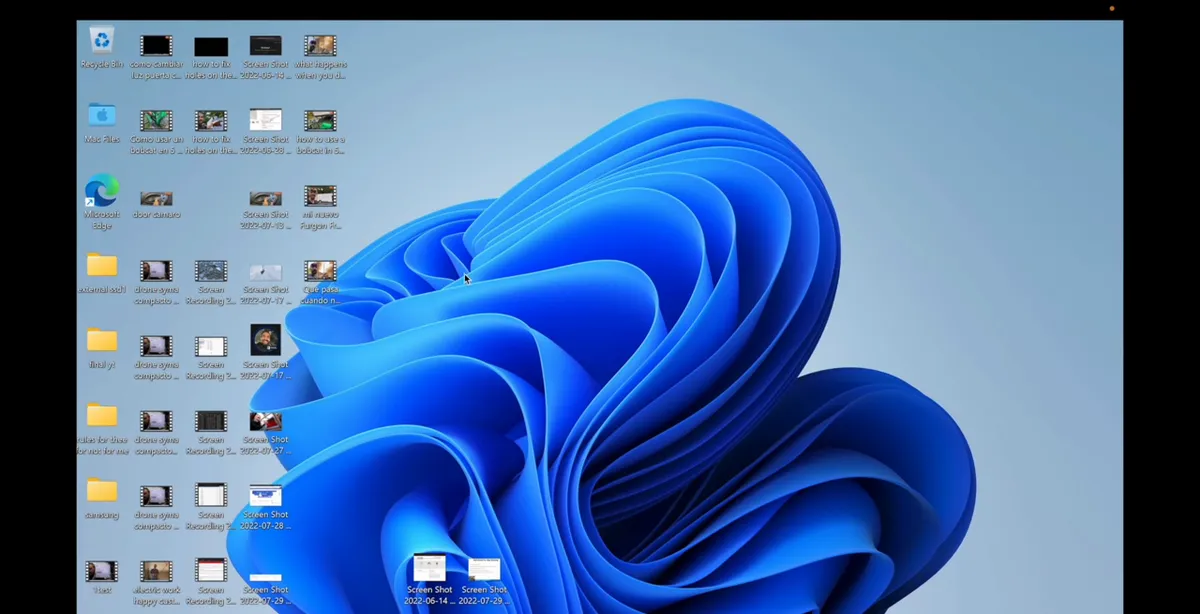
- Choose full screen and it's like being on a Windows computer.
- Your Mac desktop files appear on the Windows desktop, so you can open them in Windows apps without copying anything.
- To leave, move the pointer to the top of the screen and click Exit Full Screen.
- Parallels also has a mode that shows Windows apps right next to your Mac apps, without a separate Windows desktop.
Step 14Install the Windows apps you need
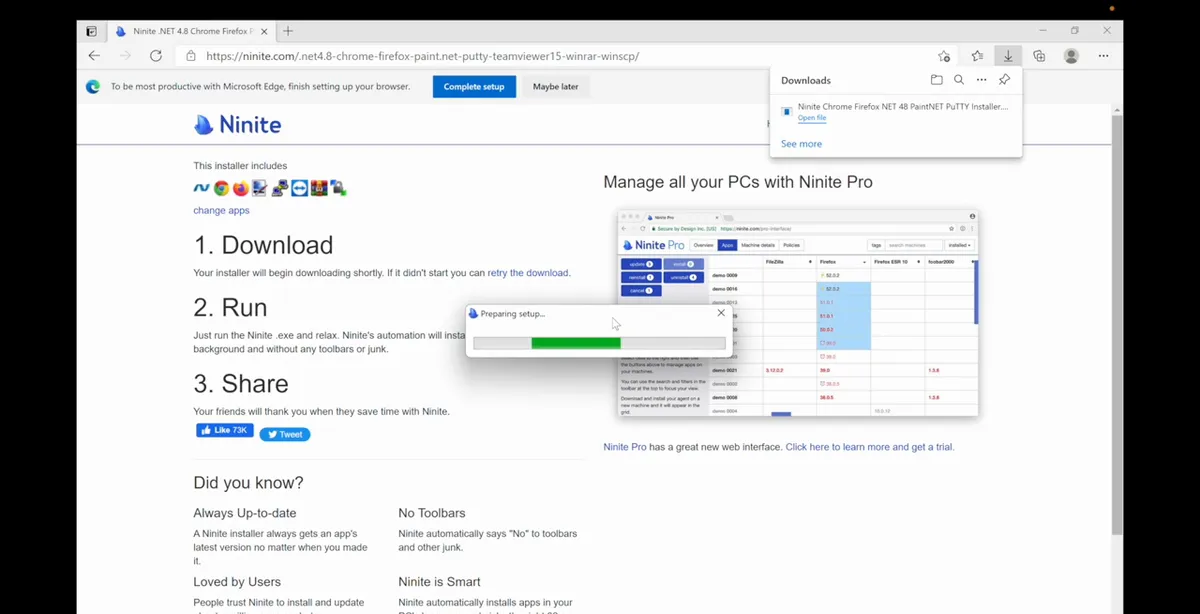
- Now install the Windows programs you were missing on the Mac. The video mentions apps like a viewer, WinRAR and Python for coding.
- The screen in the video shows Ninite, a site that installs several common apps in one go.
- Everything worked well in the video, including File Explorer.
- Tip: look for Arm64 versions of your apps first; x64 apps also run through Windows' built-in emulation, but native ones are usually faster.
Step 15Isolate Windows from your Mac or make a backup
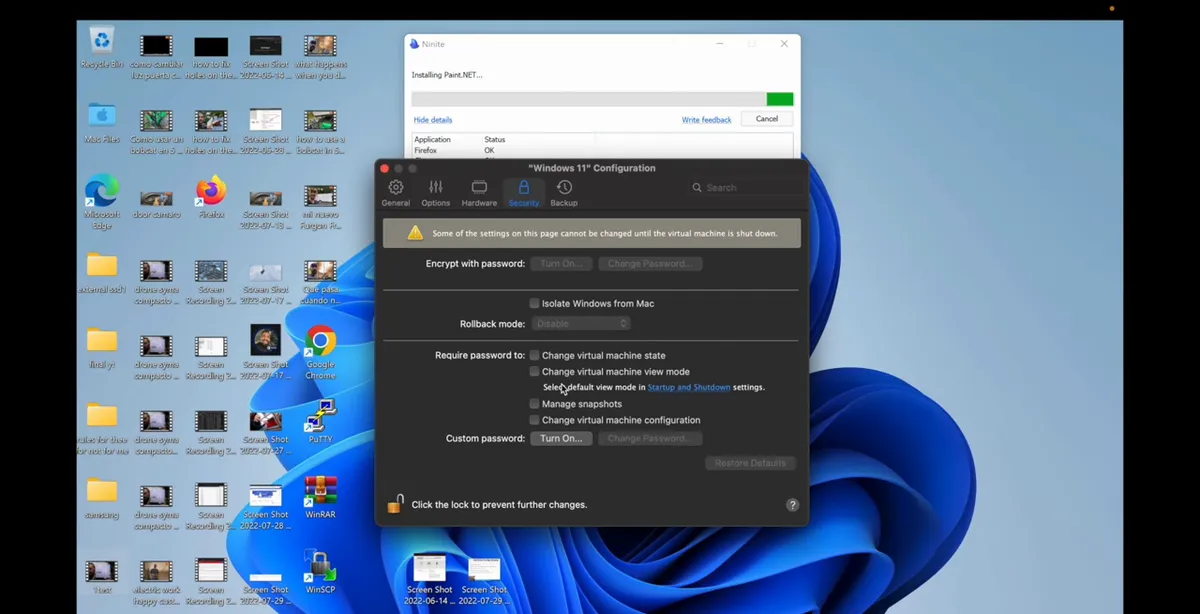
- Open the virtual machine's Configuration. On the Security tab, Isolate Windows from Mac keeps Windows separate, so it can't see your Mac files.
- Leave isolation off if you want shared files, like in the video; turn it on if you test unknown software.
- The Backup tab lets you back up the virtual machine. Do it once Windows and your apps are set up.
- There are more options, but with these you already know enough to use it.
Why Boot Camp doesn't work on M1, M2 and M3 Macs
Boot Camp let Intel Macs restart into Windows installed on a separate partition. Apple Silicon Macs use an Arm-based processor, and Boot Camp is only available on Intel-based Macs, so there's no Boot Camp Assistant on an M1, M2 or M3.
The solution is virtualization: Windows runs inside an app on macOS, as a virtual machine. You don't need to restart to switch, and Windows and macOS can share files, USB devices and the camera. The trade-off is that Windows shares the Mac's memory and processor while it's running.
If you also need to reinstall macOS at some point, see how to create a macOS bootable USB without extra software.
Which Windows 11 edition and license do you need?
Microsoft says Parallels Desktop versions 18, 19 and 20 are authorized solutions for running the Arm versions of Windows 11 Pro and Windows 11 Enterprise on Apple M1, M2 and M3 computers. The video's virtual machine showed Windows 11 Home before activation; if you're buying a license, Pro is the edition Microsoft lists for this setup.
- You need a separate license for each copy of Windows, including one in a virtual machine.
- Windows 11 Pro product keys work for both x64 and Arm versions.
- Windows runs before activation, but it keeps showing the Not active message until you enter a key.
What works and what doesn't on Windows 11 for Arm
Most everyday apps work. According to Microsoft, x64 and x86 apps run through emulation, and 64-bit Arm apps run natively. There are limits:
| Feature | Works on an Apple Silicon Mac? |
|---|---|
| Office, browsers, utilities (x64 or Arm64) | Yes |
| Apps that need DirectX 12 | May not work |
| Windows Subsystem for Linux (WSL) | No (needs nested virtualization) |
| Windows Sandbox | No |
| 32-bit Arm apps from the Store | No |
| Some drivers and anti-cheat software | Check with the vendor |
If a specific program is the reason you need Windows, test it in the trial before you buy licenses.
Troubleshooting the Windows 11 install on a Mac
| Problem | What to try |
|---|---|
| Windows download stuck | Close the window and start the download again (as the video recommends); check your internet. |
| Mouse trapped inside Windows | Press Control + Option (Control + Alt on a PC keyboard). |
| Not active / error 0xC004F213 | Enter a valid product key in Settings > System > Activation. |
| Windows feels slow | Close other heavy Mac apps; suspend Windows when you aren't using it. |
| Can't see Mac files in Windows | Check that Isolate Windows from Mac is turned off. |
| Program won't install | Look for an Arm64 or x64 version; some old 32-bit or driver-based apps won't run. |
Tips before you start
- Plug the MacBook into power and use a fast connection for the download.
- Install Windows 11, not Windows 10: Windows 10 support has ended.
- Take a snapshot or backup after Windows and your apps are set up.
- Keep macOS and Parallels updated; check the Parallels site for current system requirements.
- If Windows on your Mac is mainly for one tool, also consider whether a web version exists.
Related guides: use your iPhone from your Mac with iPhone Mirroring and disable Efficiency Mode in Windows 11 for good.
Frequently asked questions
Can I use Boot Camp on an M1 Mac?
No. Boot Camp only works on Intel-based Macs. On M1, M2 and M3 Macs you run Windows 11 in a virtual machine such as Parallels Desktop.
How long does it take to install Windows 11 on a Mac with Parallels?
In the video, setup started at 10:51 and Windows was done at 10:56, less than 10 minutes on an M1 Max. The download before that can take a few minutes or a couple of hours depending on your internet speed.
Do I need to buy a Windows license to run Windows 11 on a Mac?
Windows installs and runs without a key, but it shows as not active. To activate it you need a Windows license; Microsoft requires a separate license for each copy, including virtual machines.
Which version of Windows runs on Apple Silicon?
The Arm version of Windows 11. Parallels downloads it automatically when you click Install Windows.
Can I install Windows 10 on an M1 Mac instead?
The video recommends Windows 11 because Windows 10 was going to become obsolete, and Microsoft ended Windows 10 support in October 2025.
How do I get my mouse out of the Windows window in Parallels?
Press Control + Option on a Mac keyboard or Control + Alt on a PC keyboard.
Can Windows on my Mac see my Mac files?
Yes, by default your Mac desktop files show up in Windows. Turn on Isolate Windows from Mac in the Security settings if you want to keep them separate.
Will x64 Windows programs run on an M1 Mac?
Many do, through Windows 11's built-in emulation. Arm64 apps run best, while apps needing DirectX 12, WSL, Windows Sandbox or special drivers may not work.
Watch the video


Comments
Comments appear after Gabriel reviews them.
Loading comments…