

Step-by-step guide
How to install sliding rails and rack-mount servers in a server rack
Short answer: to install sliding rails and a server in a rack, follow the diagram that comes with the rail kit, mount the left-front and right-front rails in the same rack units (U) on all four posts until they click, extend the rails, set the server's side standoffs into the rail slots until it clicks, press the release and slide the server in. Then lock the front bezel and plug its two power supplies into different power sources.
In this video I'm at a big customer site installing new rack servers (Dell EMC PowerEdge units) in their data closet. You'll see how I read the printed instructions on the rail kit box, use the exact rack positions the customer assigned, fix a rail that didn't fit by moving a rack post, put on the locking front bezel and why every server goes to two UPS units. Below are the steps with photos from the job, the checks to do before you leave and a troubleshooting table.
In this article
- Read the diagram printed on the rail kit box
- Follow the click-extend-insert sequence
- Use the rack units the customer assigned
- Identify the left-front and right-front rail
- Seat the rail pins in the rack post holes
- Check the standoffs on the server
- Confirm the rails are ready
- Slide the server in on the rails
- If a rail doesn't fit, adjust the rack post depth
- Move the post with its threaded adjuster
- Tighten everything with screws
- Install the locking front bezel
- Lock the bezel with the key
- Read the front LCD for errors
- Plug both power supplies into different sources
- Understand the UPS and PDU setup
- Finish the cabling and check redundancy
- Redundant rack power: two UPS units, two PDUs
- Sliding rails vs static rails
- Square-hole, round-hole and threaded racks
- Troubleshooting server rail installation
- Checklist before you leave the customer
- Frequently asked questions
- Watch the video
Step 1Read the diagram printed on the rail kit box
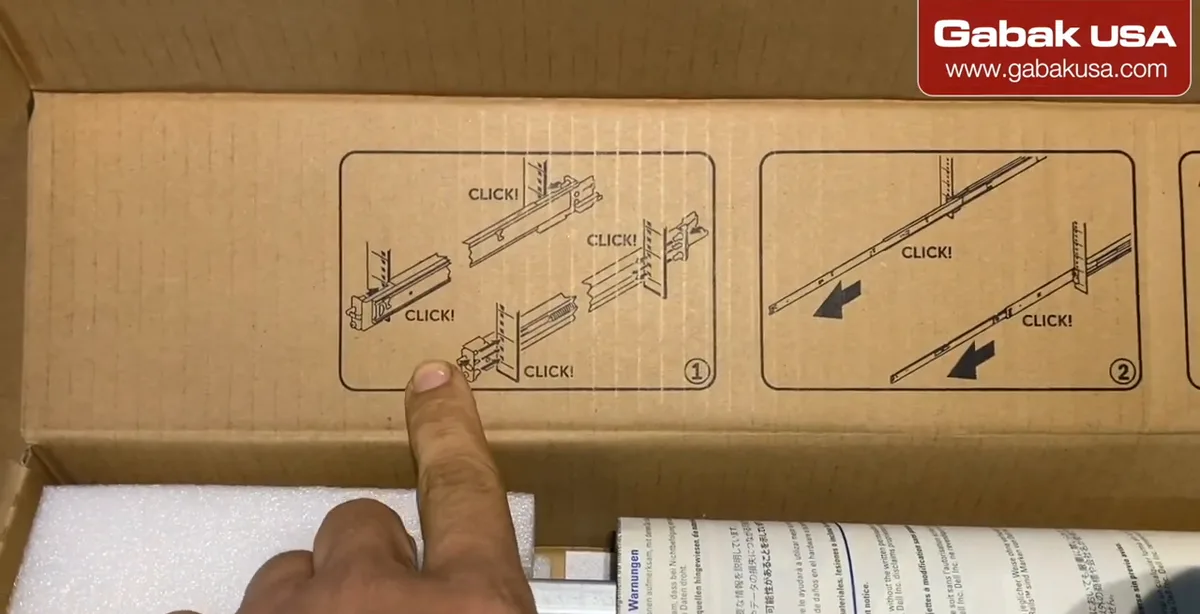
- Every rail kit is a little different, so start with the instructions that come with it. In the video the steps are printed on the inside of the box.
- Check the kit: two outer rails (left and right), any screws or adapters, and the paper guide.
- Why it matters: rails for the same server brand can still change between models and generations.
- Common mistake: throwing away the box before you've looked at the drawings.
Step 2Follow the click-extend-insert sequence
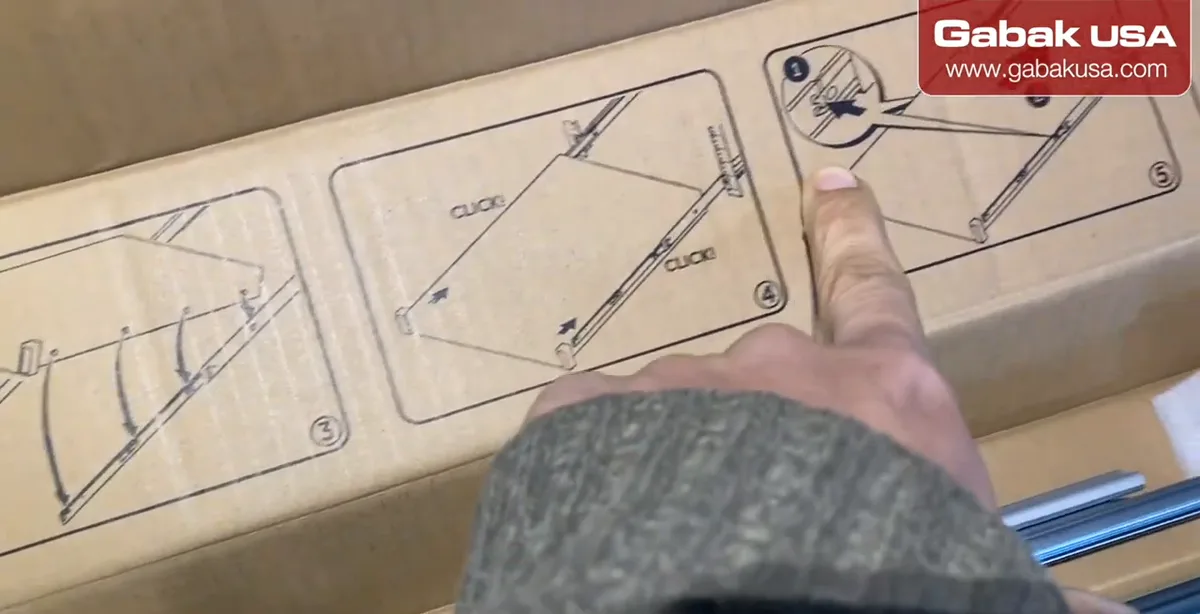
- The sequence on the box: (1) click the rail into the holes of the rack posts, (2) extend the rail out, (3) put the server on it so its screws (standoffs) fit in the holes, and it clicks.
- (4) Push the release tab up or down (it depends on the kit) and push the server inside.
- Dell's sliding-rail guide describes the same idea: pull the inner rails out until they lock, seat the server's standoffs in the slots, push until the levers click, then press the slide-release buttons and slide it in.
Step 3Use the rack units the customer assigned
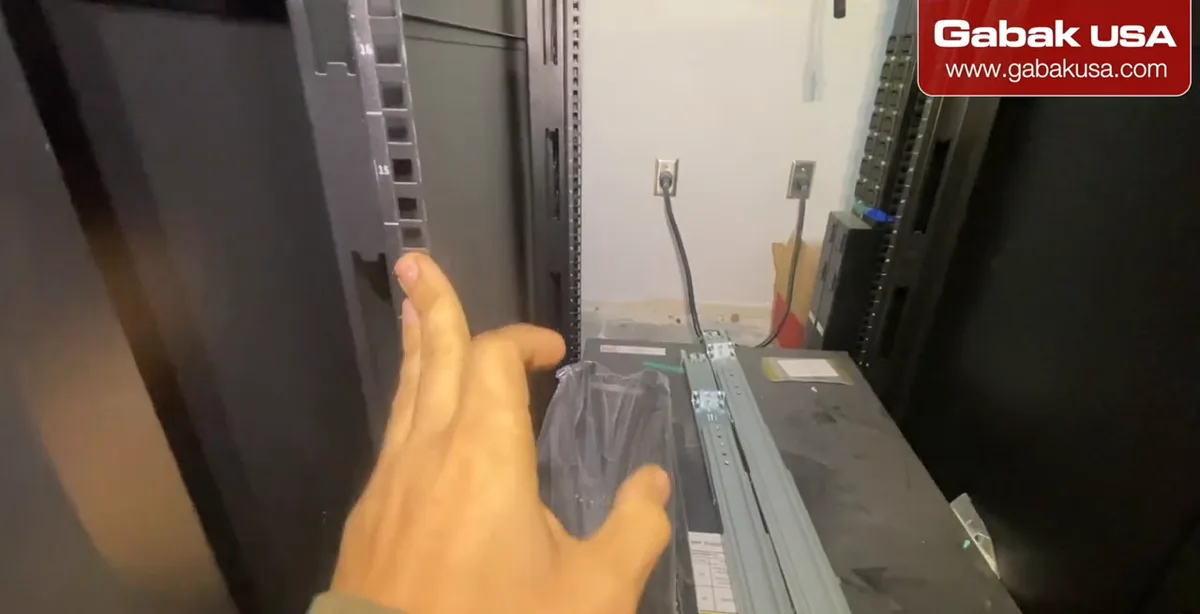
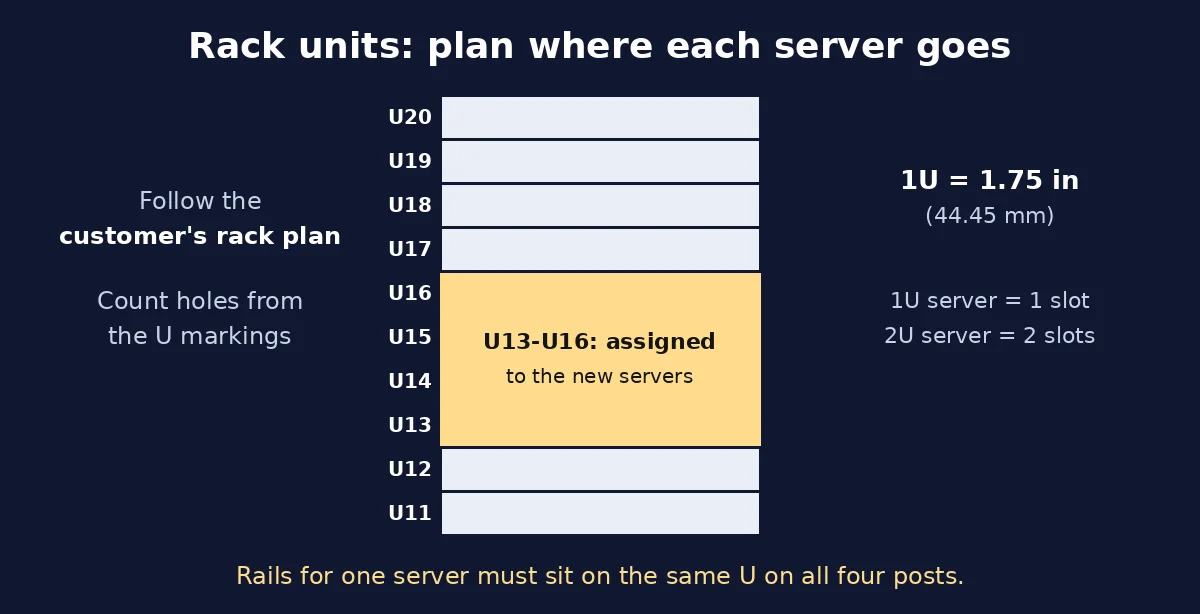
- Ask where each server goes. In the video the customer gave the positions (U13 to U16), and each company has its own order, so keep it.
- Find the U numbers printed on the rack posts and mark the top and bottom of each server's space.
- One rack unit (1U) is 1.75 inches; a 1U server takes one slot, a 2U server two.
- Dell's rail guide also notes to start with the allotted space closest to the bottom of the rack, which keeps the rack more stable.
Note: If you're unsure of the plan, confirm with the customer before mounting rails. Moving a loaded server later is much more work.
Step 4Identify the left-front and right-front rail
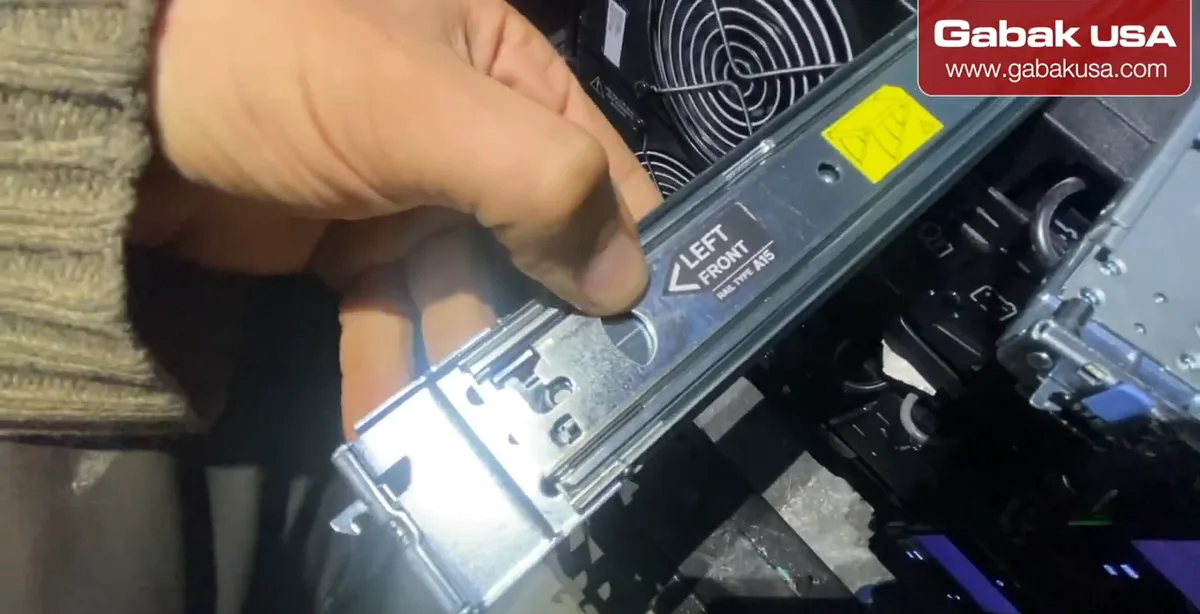
- Rails are labeled. In the video one says left front (or front left) and the other right front.
- "Left" and "right" are as you look at the rack from the front, and the front end goes on the front posts.
- Common mistake: swapping left and right or mounting a rail backwards. The server then won't latch or the slides won't extend.
Step 5Seat the rail pins in the rack post holes
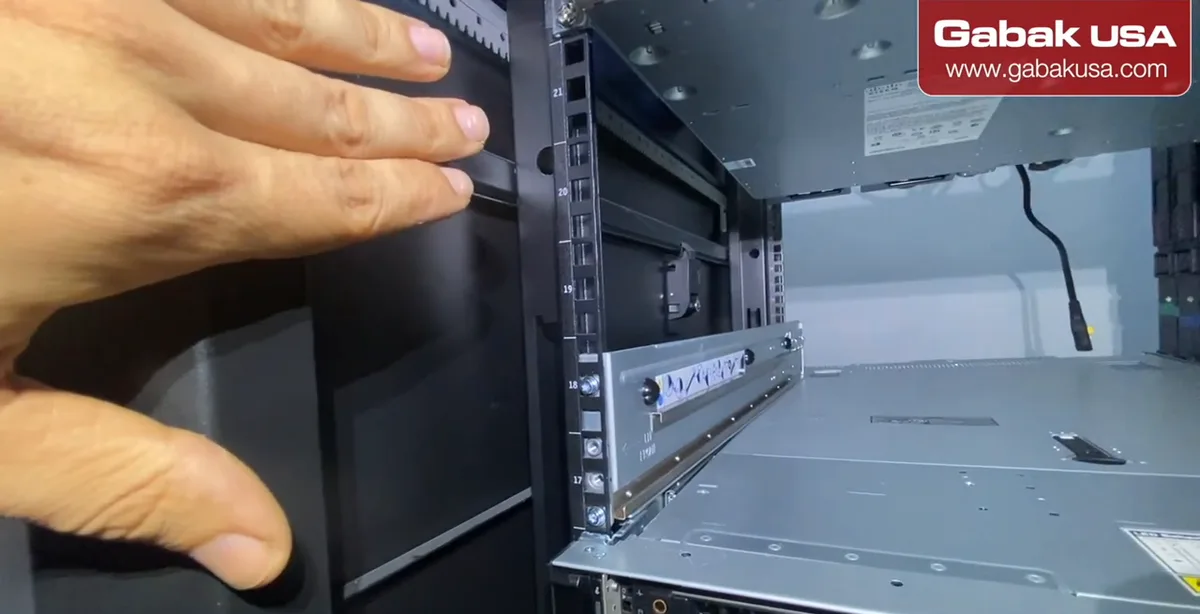
- The pins at each end of the rail go inside the holes of the posts, front and back, in the U spaces you marked.
- Push each end until the latch clicks. Do the same with the other rail at exactly the same height.
- Tool-less rails like these fit square-hole or unthreaded round-hole racks; threaded-hole racks need screws or an adapter kit.
- Tip: count holes on both sides; a rail one hole off makes the server sit crooked or not slide at all.
Step 6Check the standoffs on the server
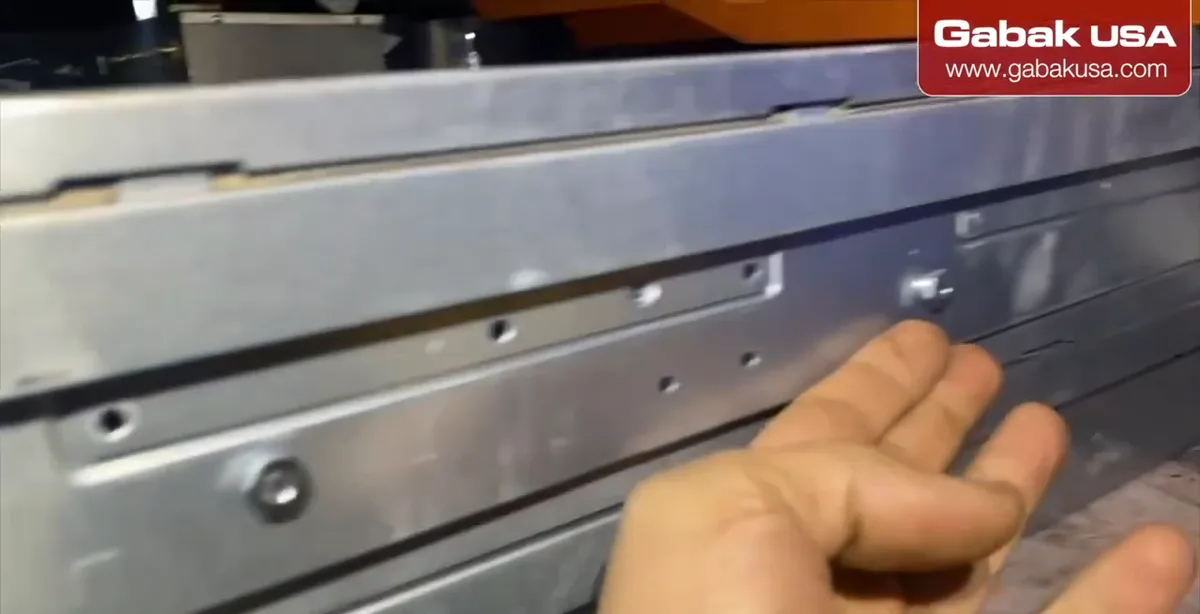
- The round screws (standoffs) on the side of the server are what sit on top of the rails and hold the server.
- Make sure none are missing or bent before you lift the server.
- Why: those few standoffs carry the whole weight of the server when it is pulled out.
Step 7Confirm the rails are ready
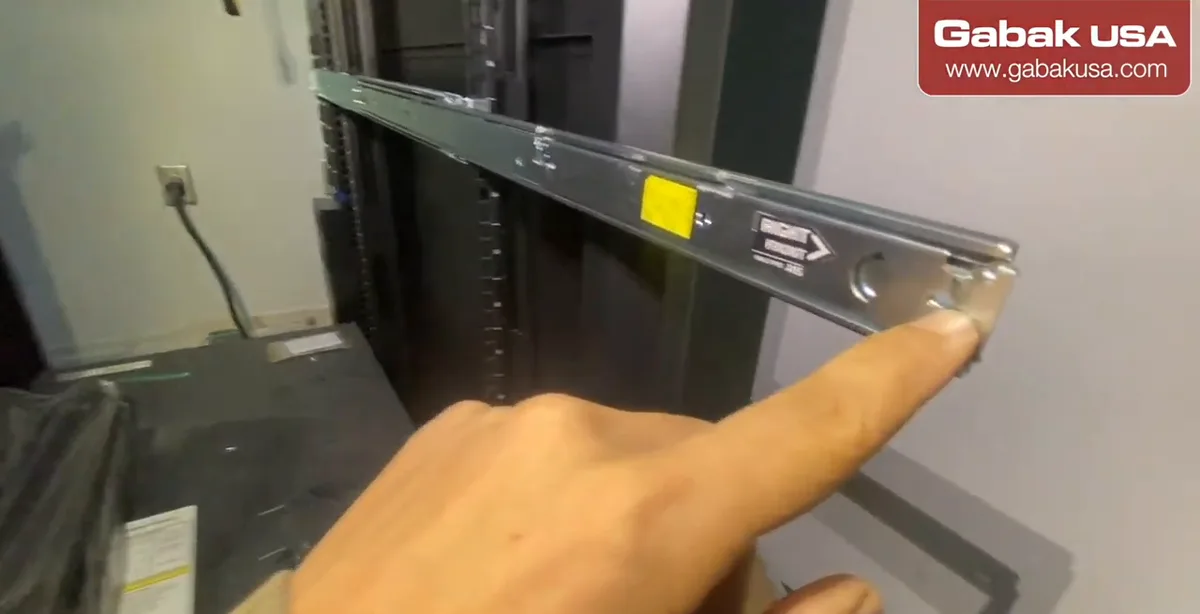
- With both rails in place you have the gap ready for the new server.
- Check that both rails are level and at the same U, and that the latches on all four ends are closed.
- Clear the floor: packaging, ladders and tools near the rack are tripping hazards while you carry a server.
Step 8Slide the server in on the rails
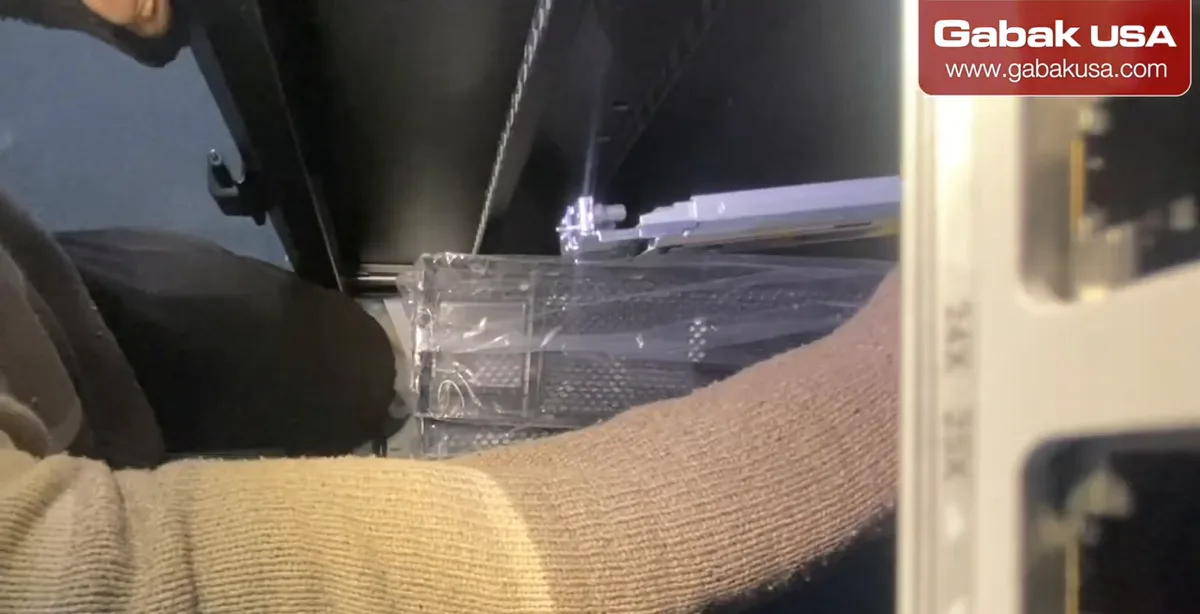
- Extend the rails, set the server's standoffs into the rail slots until it clicks, then press the release and push it inside.
- Keep the server level as you push; if it binds, stop and check the standoffs rather than forcing it.
- Dell's documentation calls 2U servers a two-person lift. Get help for heavy units.
Caution: Pull out only one server at a time and never lean on an extended server. A rack with several servers extended can become unstable.
Step 9If a rail doesn't fit, adjust the rack post depth
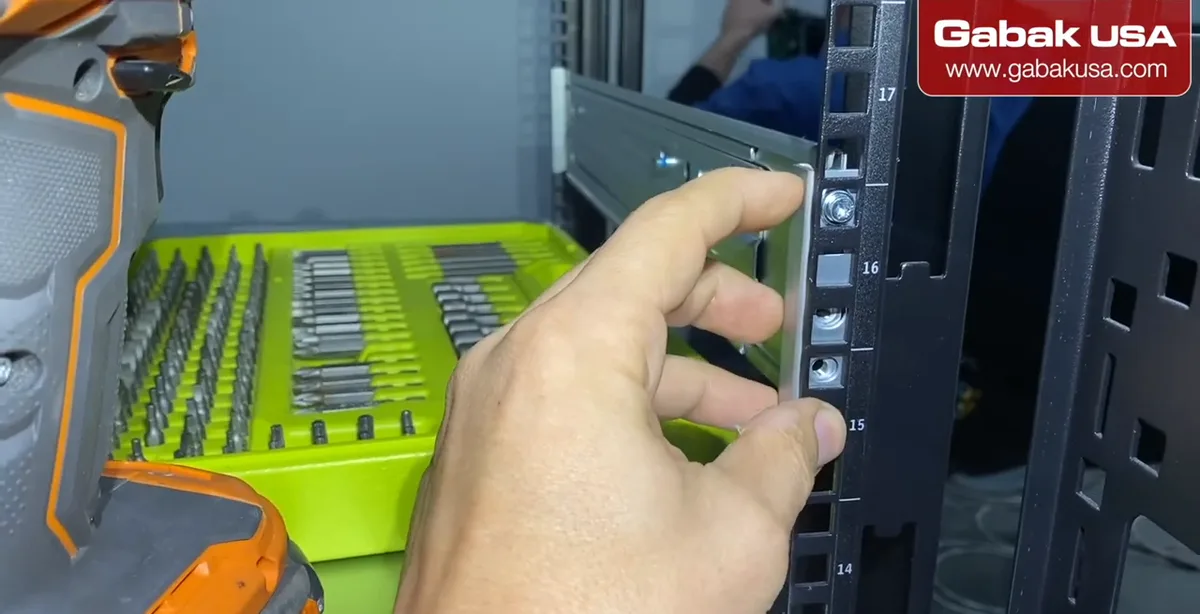
- The third server in the video was different from the rest: its rails didn't reach the rear post.
- The fix: move the rear post a little toward you so the rail fits. The front post stays where it is.
- Always check your rail kit's supported rack depth before the job; some kits have adjustable length, some don't.
Step 10Move the post with its threaded adjuster
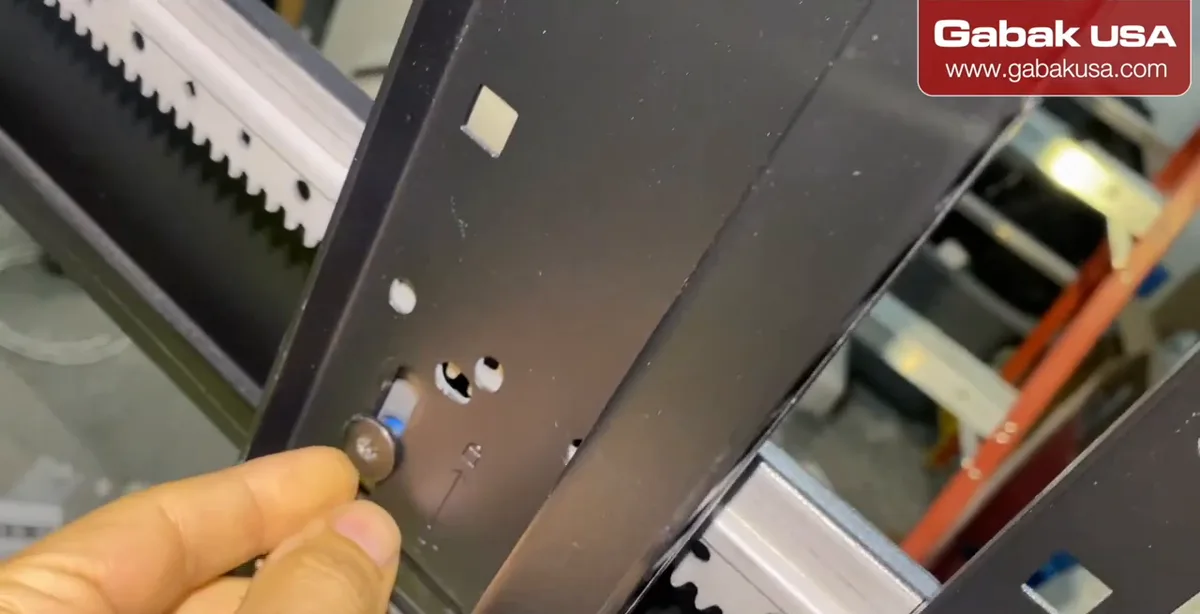
- In this rack I removed the screws on the post; in the middle there is a bar with a thread that let me move the column.
- With the post in its new position the rail fits, and the front needed nothing.
- Not every rack can do this. Check the rack manual first; if the posts are fixed, you need a rail kit that matches the depth.
Step 11Tighten everything with screws
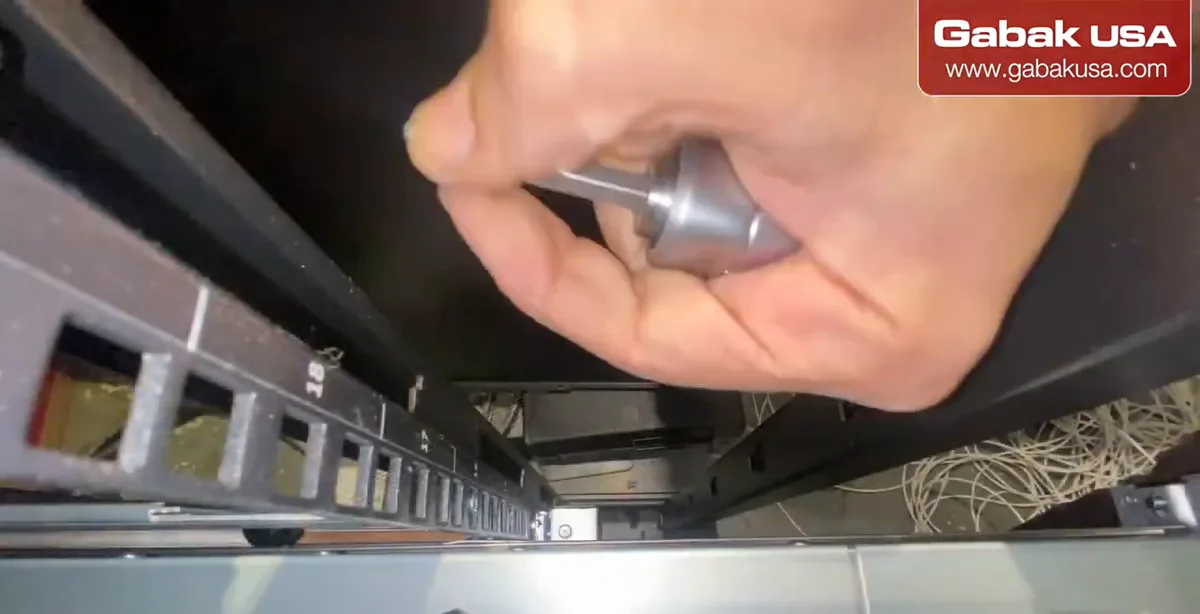
- Put the post screws back and tighten them before the server goes in.
- Usually everything in the rack is fixed with these same type of screws.
- Then install the server on its rails as before. In the video I put in the third server this way and then set it up.
Step 12Install the locking front bezel
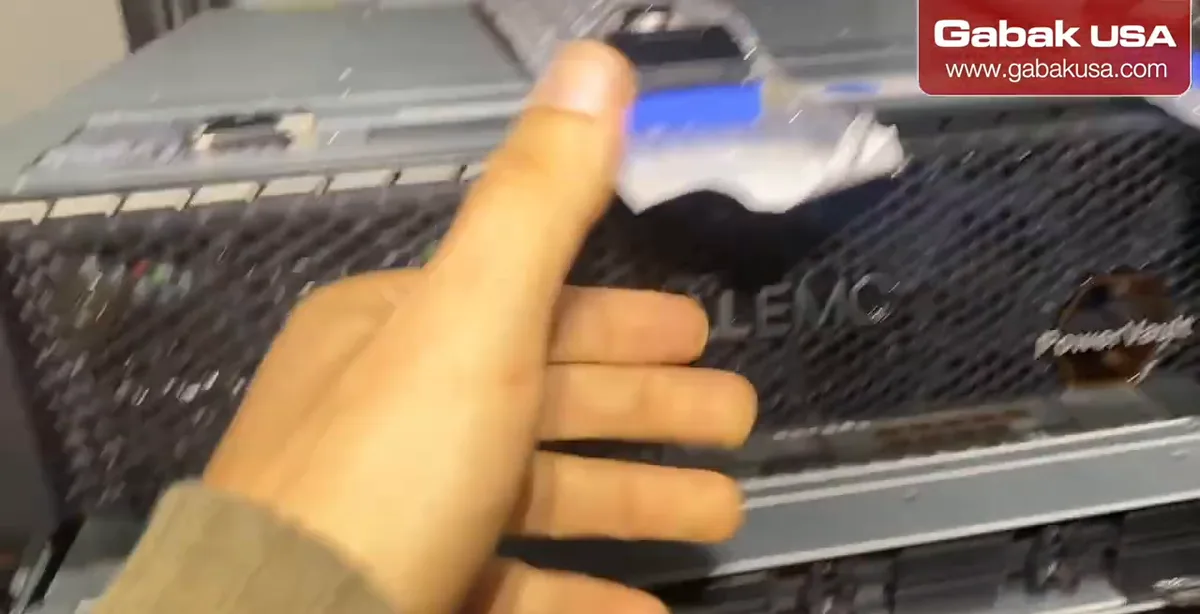
- New servers come with a front panel (bezel) and a key. Hook it on one side and press it onto the other.
- With the bezel on, you push it to open and get access to the drives, and to the front VGA port, when you need to.
- Keep the key with the customer's documentation, not in the lock.
Step 13Lock the bezel with the key
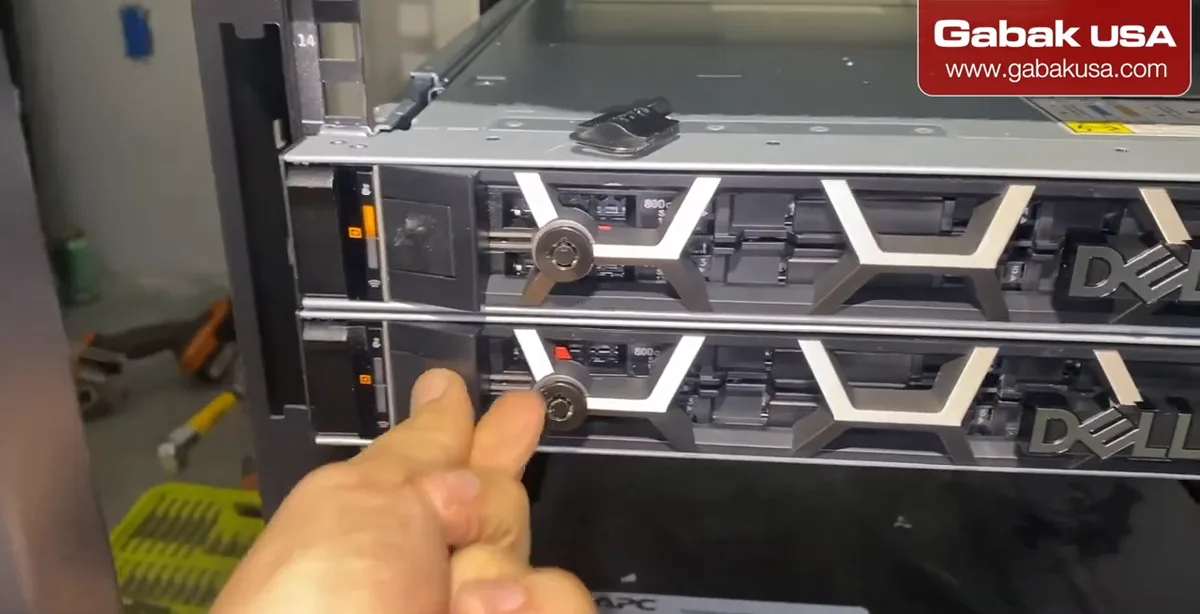
- Turn the key to lock it. That way nobody can easily remove the hard drives; it discourages vandalism and theft.
- Check that the bezel doesn't open when you pull on it gently.
Step 14Read the front LCD for errors
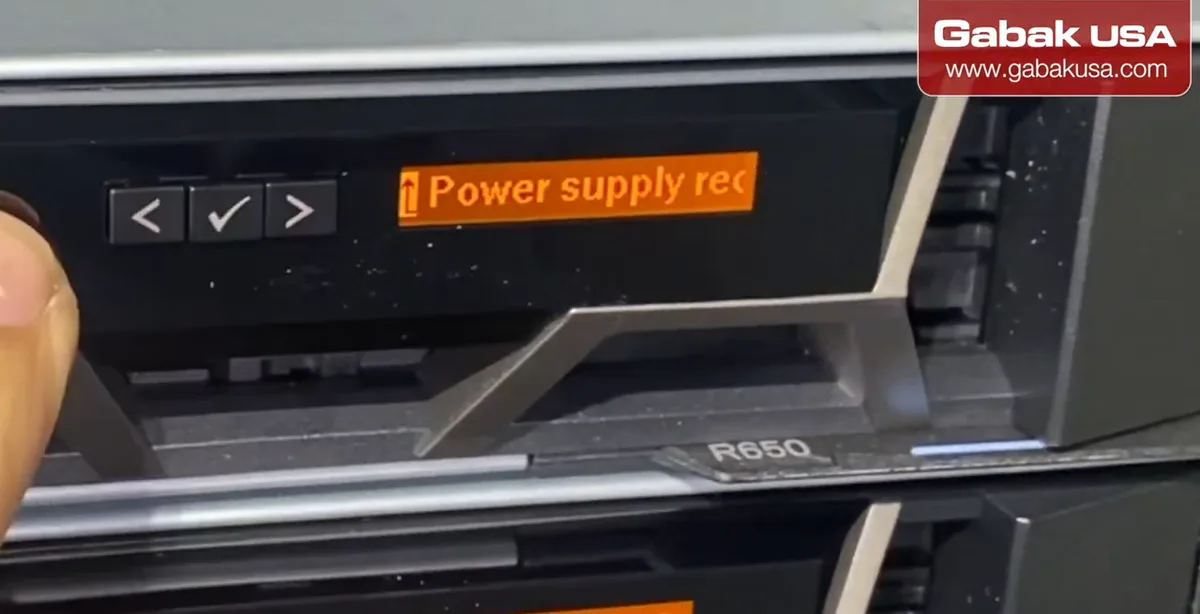
- Many servers have a small front display that tells you if something is wrong.
- In the video it shows a power supply warning because I hadn't plugged in the other power supply yet.
- Before you leave, the display should show no errors. Fix every warning or write it down for the customer.
Step 15Plug both power supplies into different sources
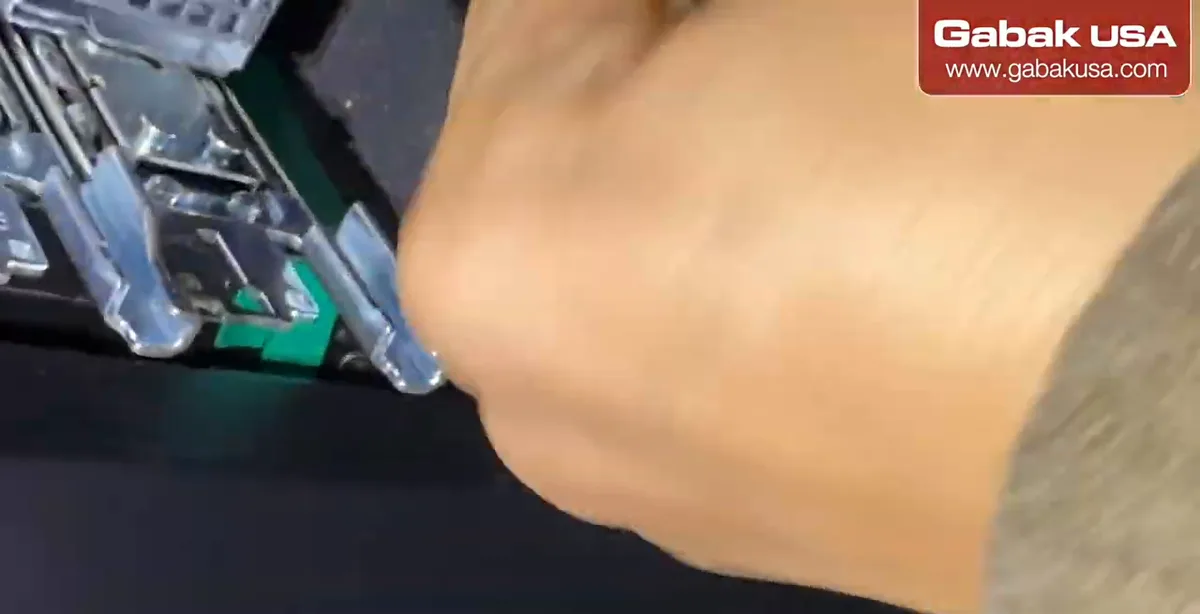
- These servers have two power supplies, one on the left and one on the right. The Cisco switches in this rack have two as well.
- Each power supply goes to a different PDU / UPS, not both to the same one.
- Common mistake: plugging both cords into the same power strip. Then the second power supply protects you from nothing.
Step 16Understand the UPS and PDU setup
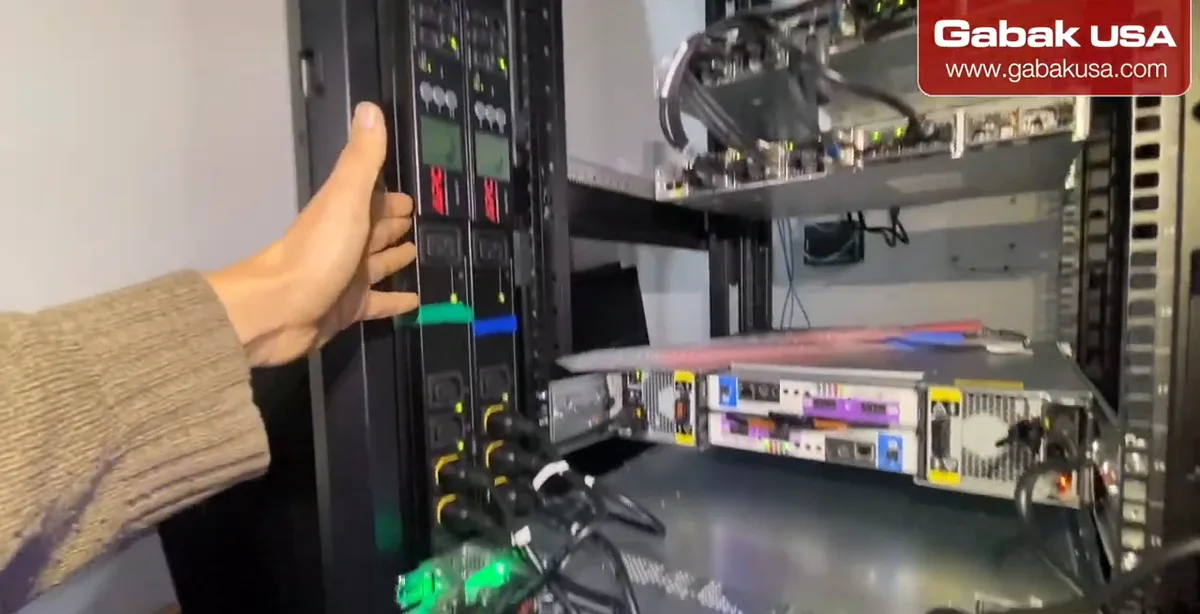
- This rack has UPS 1 and UPS 2 (battery backups) and PDUs (power distribution units) feeding the equipment.
- If one UPS fails, the equipment keeps working, because power automatically switches to the second side.
- That's how it should be done for all production equipment.
Step 17Finish the cabling and check redundancy
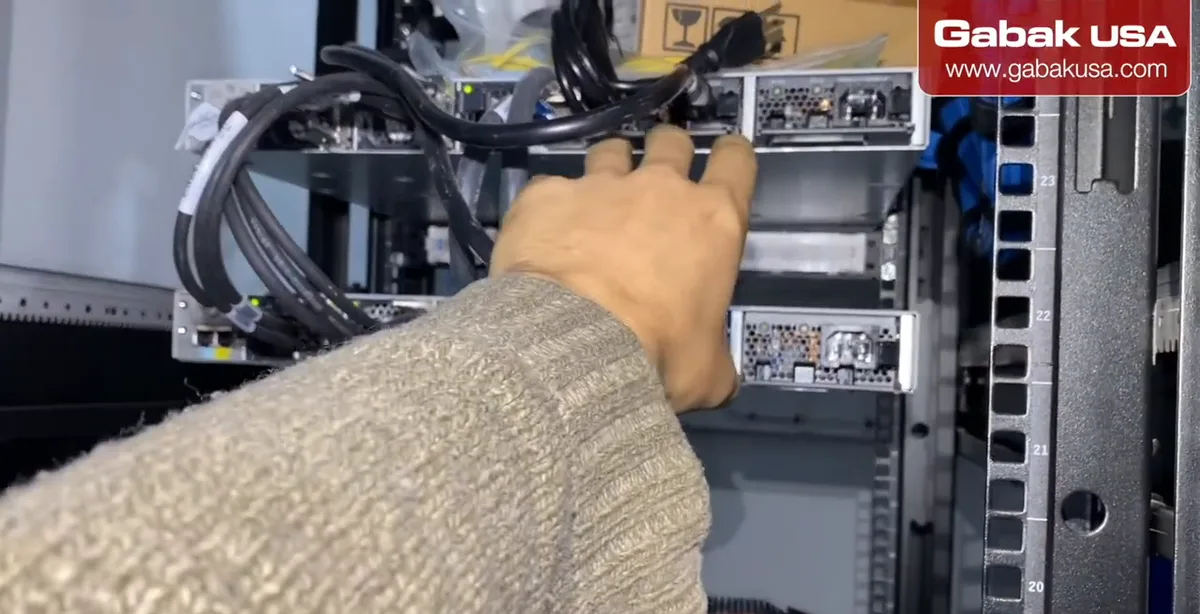
- Plug the remaining cords so every device with two power supplies is on both sides.
- Label cords (A/B) if the customer allows it; it makes later work faster.
- Final check: front LCD clean, bezel locked, rails latched, cables not blocking airflow or the rails' sliding path.
Redundant rack power: two UPS units, two PDUs
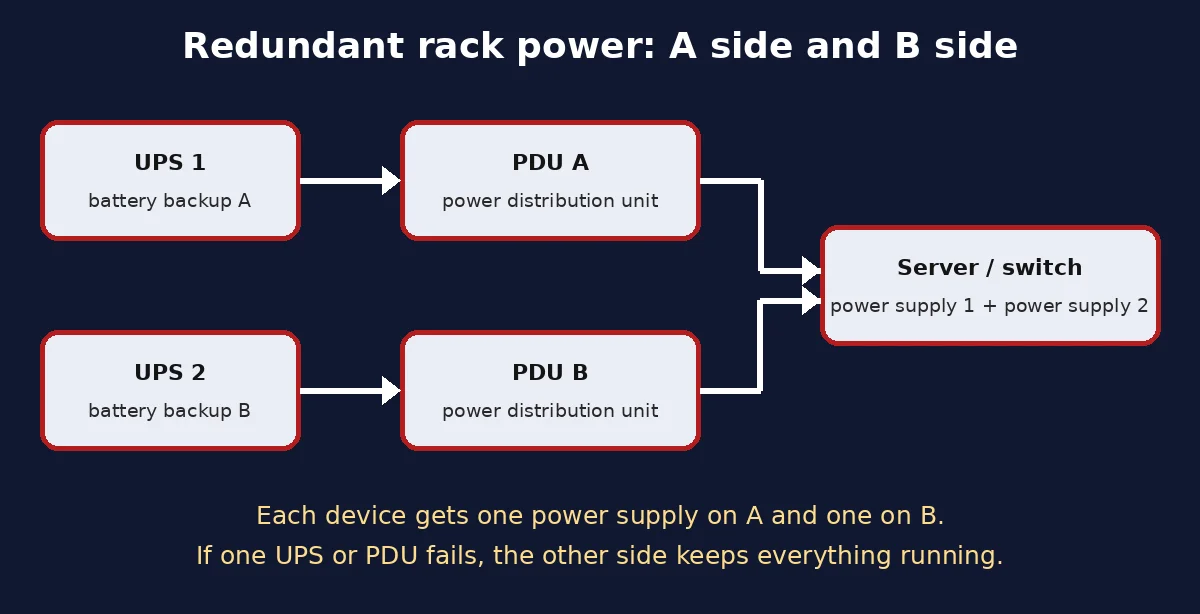
In the video every server and switch has two power supplies. The idea is simple: power supply 1 is fed from one UPS (through its PDU), power supply 2 from the other. If one UPS fails or is being serviced, the device keeps running on the other side.
- UPS (uninterruptible power supply): batteries that keep equipment on during an outage.
- PDU (power distribution unit): the outlet strip mounted in the rack.
- Dual power supplies: the server can run on either one.
For a small UPS used on a single PC or network closet, see my CyberPower ST425 UPS review and setup.
Sliding rails vs static rails
| Sliding rails | Static rails | |
|---|---|---|
| Server can be pulled out | Yes, on the rails (for service) | No, you remove it |
| Typical use | Servers you open for drives, memory, cards | Equipment you rarely service |
| Installation | Inner rails extend; server drops or stabs in | Server rests on fixed rails |
Dell's PowerEdge documentation describes two ways sliding rails take the server: drop-in (the server's standoffs drop into J-slots on the extended rails) and stab-in (the inner rail members are attached to the server first and then pushed into the outer rails in the rack). Your rail kit's drawing tells you which one you have.
Square-hole, round-hole and threaded racks
Check the posts before you order or install rails:
- Square holes: the most common in server racks; tool-less rails clip straight in.
- Unthreaded round holes: many tool-less rails also fit these.
- Threaded holes: need a tooled mounting. Dell's guide lists user-supplied #10-32, #12-24, M5 or M6 screws (eight of them) for that configuration.
Also check the depth between front and rear posts. As the video shows, a rail that's too short for the rack means moving a post (if the rack allows it) or getting a different rail kit. For another rack job, see installing an AT&T modem and a Cradlepoint 4G LTE router in a rack.
Troubleshooting server rail installation
| Problem | Likely cause | Fix |
|---|---|---|
| Rail doesn't reach the rear post | Rack deeper than the rail's range | Move the rear post (if adjustable) or use the right rail kit |
| Server sits crooked | Rails at different U or one hole off | Re-count holes and re-seat one rail |
| Server won't latch on the rails | Standoffs not in the slots, rails swapped left/right | Lift it off, check labels (left front / right front) and try again |
| Server won't slide in | Release lock not pressed, cable in the way | Press the slide-release buttons, move cables |
| Front LCD shows a power supply warning | Second power supply not plugged in | Plug it into the other PDU/UPS |
| Bezel won't lock | Not fully seated on one side | Remove and hook it on again |
Checklist before you leave the customer
- Servers are in the positions the customer assigned, in their order.
- All rails are latched front and back; screws on adjusted posts are tight.
- Front bezels locked; keys handed over.
- Every device with two power supplies is on both power sides.
- Front displays show no errors.
- Network cables are connected and labeled; if you have to identify unknown cables in the closet, my guides on using a network cable tester and tracing cables with a toner will help.
- Floor clean: boxes, packaging and tools removed.
Frequently asked questions
How do you install sliding rails in a server rack?
Mount the left-front and right-front rails in the same rack units on the front and rear posts until the latches click, extend the inner rails, set the server's standoffs into the rail slots, then press the release and slide the server in. Always follow the diagram that comes with your rail kit.
How tall is 1U in a server rack?
One rack unit (1U) is 1.75 inches (44.45 mm). A 1U server uses one unit of rack space, a 2U server two.
Which rail is left and which is right?
As seen from the front of the rack. Rails are labeled, for example left front and right front, and the front end goes on the front posts.
What do I do if the server rails are too short for my rack?
Check whether the rack posts are adjustable; in the video I moved the rear post toward the front using its threaded bar. If the posts are fixed, use a rail kit that supports your rack depth.
Can tool-less rails go in a threaded-hole rack?
Not directly. Tool-less rails are made for square-hole or unthreaded round-hole racks; threaded racks need the tooled mounting option with screws or an adapter kit.
Why do servers have two power supplies?
For redundancy. Each one goes to a different UPS/PDU, so if one power source fails the server keeps running on the other.
What is a server front bezel for?
It covers the front of the server and locks with a key, so nobody can easily remove the hard drives.
Should I install servers from the bottom of the rack up?
Dell's rail guide recommends starting with the allotted space closest to the bottom, and heavy equipment low keeps the rack more stable. Always follow the customer's rack plan.
Watch the video


Comments
Comments appear after Gabriel reviews them.
Loading comments…